 Pic1
Pic12) Remove the speaker (3 phillips screws on top, and unplug) [see pic1 above]
3) Unplug the electrical connector for the adjustable shock [see pic2 below]
Adjustable Suspension Replacement for the Rear of the 1984 300ZX Turbo
Contributed By: Brad E. Graham
I replaced the rear factory adjustable suspension on my '84 Nissan 300ZX Turbo
with aftermarket, non-adjustable, KYB shocks.
You should use all appropriate safety precautions when you work on your car. If this method doesn't work for you, or you screw your car up trying to follow my example, oh well, don't call me.
Removing Old Shock:
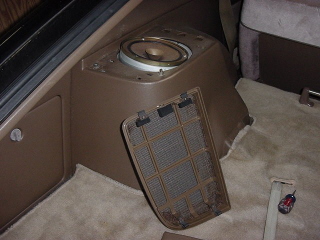
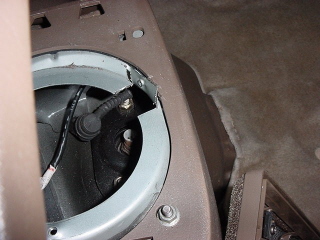
1) Remove the speaker cover on the top of the shock tower by prying the rear
edge up then pulling the clips loose. [see pic1 below]
Pic1
2) Remove the speaker (3 phillips screws on top, and unplug) [see pic1 above]
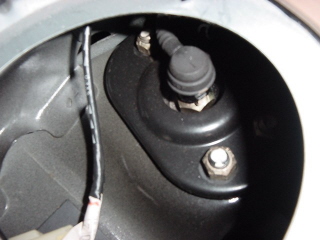
3) Unplug the electrical connector for the adjustable shock [see pic2 below]
 Pic2
Pic2
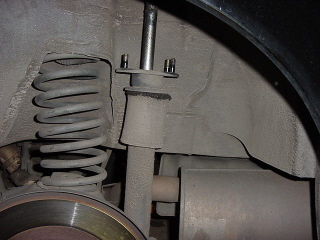
4) Remove the 3 nuts holding the shock studs to the shock plate. [see pic2
above] Photo shows 2 of the 3 nuts you must remove, other is hidden in the
shadow on the right.
Space is tight, but I used a regular sized ratchet
w/ an extension for the easy nut, and just the ratchet and the socket for the
other 2 nuts. Edges of shock tower are sharp!, avoid blood loss. The
removed shock plate is shown in [pic2b below].
 Pic2b
Pic2b
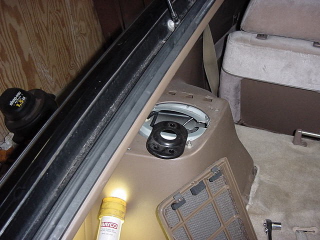
5) Loosen the lug nuts on the wheel.
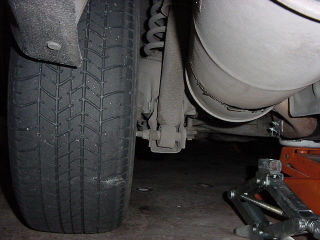
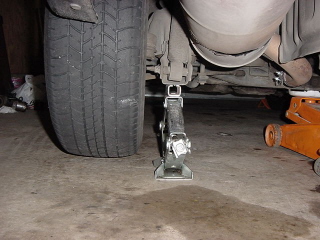
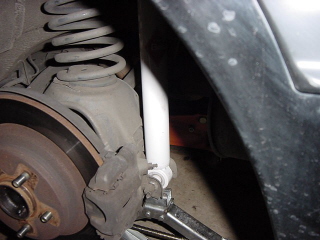
6) Jack the car up - photos show a scissors jack under the spring seat stay and
hydraulic jack under the differential. You just need to get the tire off of the
ground. [see pic3, pic4 below]
 Pic3
Pic3
 Pic4
Pic4
7) Remove the wheel.
8) When you removed the 3 nuts in ( step 4) above, the shock insulator plate w/
the 3 studs should be free to slide down the shock [see pic5 below] At that
point, you can reach the top of the shock in the fender well with a wrench. Use
the wrench in the fenderwell to keep the shock rod from turning, and wrench the
center nut off [see pic6 below]. As seen in the photo, you may have to dremel or
cut a section of the shock tower in order to reach the nut with a socket.
 Pic5
Pic5
 Pic6
Pic6
9) Remove the bolt going through the spring seat stay [see pic4 above]. I used a
deep well socket and an adjustable wrench.
10) Wiggle the old shock out of the spring seat stay and slide it out of the
fenderwell.
Installing New Shock:
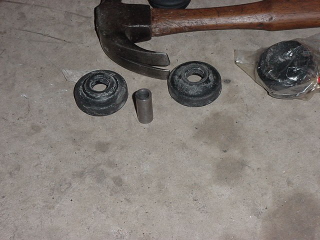
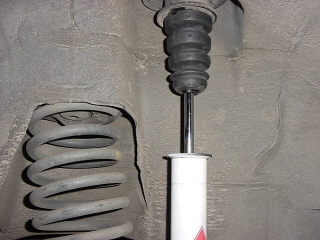
11) I ordered a "kit" to convert adjustable turbo suspension to non-adjustable from Strano's for +/- $50,-. The kit was pretty wimpy for what it costs. Some people have had luck digging through junkyards and getting non-adjustable suspension parts that way. The reducing sleeve (center of pic) [see pic7 below] has to be slid onto the new shock [see pic8 below]. The new bump stop is also included in Strano's kit [see pic9 below]. The other parts you need will come with the shock.
 Pic7
Pic7
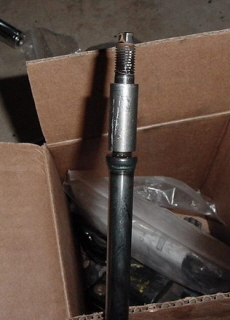 Pic8
Pic8
12) After assembling the parts in (step 11) above, I compressed the shock and
used some safety wire to keep it this way so that I could install it [see pic9
below].
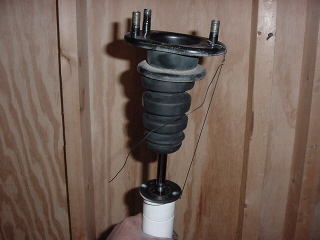 Pic9
Pic9
13) Replace bolt removed in (step 9) above into new shock [see pic9b below].
 Pic9b
Pic9b
14) Line studs on top of strut up with holes in shock tower, cut safety wire and
allow shock to extend [see pic10 below].
 Pic10
Pic10
15) There were no "hold points" for a bottom wrench on the new shock I bought. I
improvised with a large pair of pliers and some sticky duct tape, reversing step
(8) above to install the new nut on the new shock.
16) Install the old shock plate with the old nuts, reversing step (4) above.
17) I used pliers to bend the tab on the shock tower back down. Plug the speaker
back in and screw it back in. Tape the electrical connector for the old
adjustable shock out of the way so it doesn't rattle - it is no longer needed.
18) Replace the speaker cover.
19) Replace the wheel, lower the car, and torque the lug nuts.